
Environmental portrait photography captures your subject in the places that tell their story. Instead of isolating someone against a plain backdrop, you photograph them within a meaningful location, a couple on the windswept shores of Tofino where they first met, a bride in her grandmother’s garden, lovers framed by the golden aspens of Banff where they said yes. The technique combines compositional awareness, natural light mastery, and the ability to balance your subject with their surroundings so neither overwhelms the other.
For wedding and elopement photographers working across Canada’s diverse landscapes, this approach transforms portraits from simple documentation into layered narratives. The method reveals who your couples are, not just what they look like. A groom standing in the doorway of his family’s lakeside cabin carries different weight than the same person shot against seamless paper. Context becomes character.
The workflow is straightforward but demands intention. You’ll scout locations that resonate with your couple’s history, choose focal lengths that include enough environment without diminishing your subjects, work with available light to preserve the scene’s atmosphere, and direct your couple so they interact naturally with the space around them. The goal isn’t a landscape with people dropped in. It’s a portrait that breathes because of where it lives.
Mastering environmental portraits means understanding exposure balance, managing depth of field to control how much detail the background holds, and reading how different Canadian light, coastal fog, prairie sun, boreal forest shadow, shapes mood. When executed well, these images become heirlooms that preserve not only faces but the feeling of being exactly there, together, in that irreplaceable moment.
What Environmental Portrait Photography Brings to Your Wedding Stories
Modern couples aren’t just looking for wedding photos, they’re seeking images that capture the full story of their day, including the landscapes that witnessed their vows. Environmental portrait photography delivers exactly that by treating the Canadian setting as more than a backdrop. It becomes a co-star in the narrative, revealing why a couple chose to marry on that windswept Tofino beach or beneath those towering Banff peaks.
Traditional wedding portraiture isolates the couple against clean, uncluttered backgrounds. The focus stays tightly on faces, expressions, and formal poses, beautiful work, certainly, but often stripped of place and moment. Environmental portraits flip that approach. They pull back to show context: the couple small against a vast mountain range, or framed by the weathered doorway of a heritage cabin where they exchanged rings. The location isn’t decoration; it’s part of what makes their story theirs.
This resonates deeply with 2026 couples planning elopements and intimate ceremonies. They’re deliberately choosing locations for personal significance: the lake where they first camped together, the family farm in Ontario, the Rockies trail they’ve hiked for years. When you photograph them within these meaningful environments, you’re documenting not just a wedding day but the relationship between people and place. The forest, the coastline, the northern lights overhead, these aren’t just pretty; they’re chapters in the couple’s love story.
That’s the power of environmental portrait work: it honors both the emotion and the setting, creating layered images that transport viewers into the moment and the place simultaneously.
Essential Tools and Materials for Location-Based Portrait Work
Camera and Lens Selection
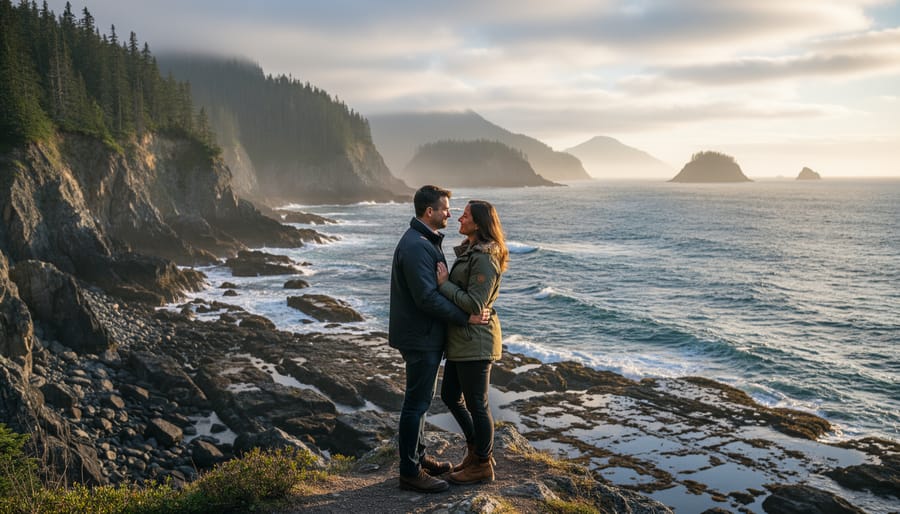
For environmental portrait work in Canadian wedding settings, your lens choices determine how much landscape enters the frame alongside your couple. A 35mm prime or 24-70mm zoom serves as your workhorse, capturing both intimate moments and sweeping context without excessive distortion. The 35mm focal length feels natural to the eye while including enough environment to tell the location’s story, ideal when photographing couples against mountain backdrops or forest clearings.
A 50mm lens works beautifully when you want slightly more couple emphasis while maintaining environmental context, particularly effective in settings where you can step back to compose. For tighter emotional moments that still honor the setting, an 85mm lets you compress the background into a soft, recognizable context while keeping faces sharp and detailed.
Your camera body matters less than its reliability in changing conditions. Choose weather-sealed gear for Canadian outdoor work, with strong dynamic range to handle bright skies against shadowed foregrounds. Full-frame sensors offer advantages in low light and shallow depth control, but modern crop sensors perform exceptionally well if you adjust your focal length choices accordingly.
Bring a circular polarizer to manage reflections on water and deepen blue skies without artificial post-processing. Pack a second body to avoid lens changes in dusty or wet conditions, keeping one wide and one standard zoom ready for spontaneous moments as couples interact with their chosen landscape.
Lighting Equipment for Natural Settings
When photographing elopements across Canada’s diverse terrain, from Banff’s alpine meadows to Tofino’s windswept beaches, your lighting kit needs to be both portable and powerful enough to shape natural light without overpowering it.
Start with a single speedlight and a wireless trigger system. This compact setup slips into any camera bag and provides crucial fill light when couples stand beneath forest canopies or against bright mountain skies. Choose models with high-speed sync capability to maintain wide apertures in midday conditions while adding just enough light to lift shadows on faces.
A 5-in-1 collapsible reflector becomes your most versatile tool in remote settings. The white side bounces gentle fill light during golden hour sessions, while the silver surface adds punch when working in deep shade. The translucent diffusion panel softens harsh overhead sun during midday ceremonies when timing isn’t flexible. Unlike battery-dependent gear, reflectors never fail, though you’ll need an assistant or creative positioning against rocks and trees in windier locations.
For modifier options that travel well, pack a small octabox or a shoot-through umbrella. These soften speedlight output to mimic the quality of overcast skies, blending artificial light seamlessly with the Canadian landscape’s natural ambiance. Skip heavy light stands in favour of compact, weighted bases that handle uneven ground and occasional gusts without toppling during intimate moments.
Safety and Preparation Considerations
Canadian wilderness offers stunning backdrops, but every outdoor portrait session demands serious safety planning before you step on location. Weather in the Rockies or coastal regions can shift within minutes, clear skies turn to storms, trails become treacherous with rain, and temperature drops threaten client comfort. Always check hourly forecasts for each location on your shot list and monitor conditions throughout the shoot day. Pack emergency supplies including first aid kits, thermal blankets, extra layers, and fully charged communication devices even for sessions you expect to last an hour.
Terrain presents hidden risks that beautiful landscapes mask in scouting photos. Rocky shorelines grow slippery with algae, forest trails conceal roots and uneven ground, and mountain paths require proper footwear your couples might not bring. Walk locations beforehand to identify hazards, then communicate specific wardrobe and footwear requirements to clients weeks before the session. For winter elopement portraits add warnings about ice patches, shortened daylight, and hypothermia symptoms.
Wildlife encounters require preparation beyond avoiding contact. Learn to stay safe from wildlife in the specific ecosystems where you’ll photograph, elk behave differently than bears, and both demand different protocols than coyotes or moose. Keep noise levels appropriate to alert animals without attracting them, and never position couples between mothers and offspring or near feeding areas.
Secure location permits before shooting in national parks, provincial lands, or private property, fines and ejection ruin sessions and damage your reputation. When conditions deteriorate beyond your backup plan, reschedule rather than risk client safety for a handful of risky shots.
Getting to Know Your Subjects and Their Story
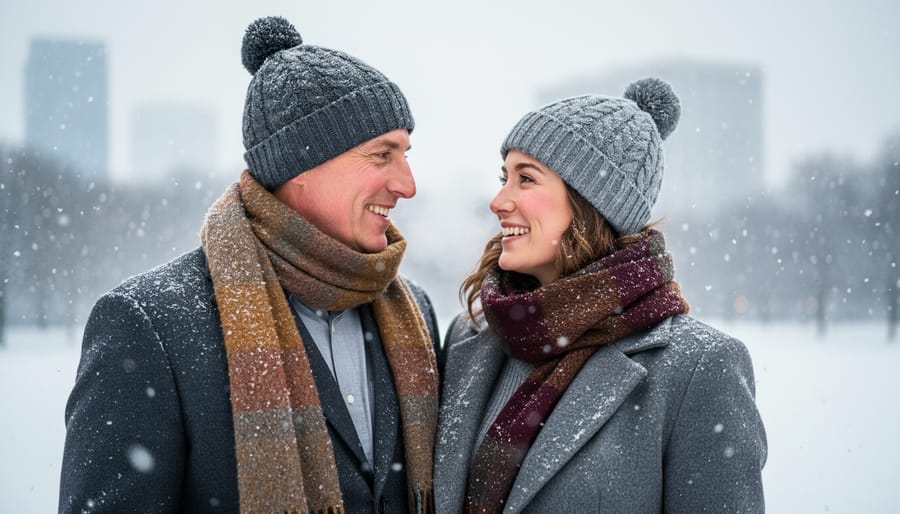
Every memorable environmental portrait begins long before you arrive at a windswept coastline or mountain ridge. The foundation is built during your initial consultation, where you shift from photographer to listener, discovering what truly connects your couple to each other and to the landscape they’ve chosen for their celebration.
Start by asking open-ended questions that move beyond logistics. How did they meet? What draws them to this particular location, is it where they got engaged, where they’ve hiked together for years, or simply a landscape that captures how their relationship feels? These conversations reveal the emotional threads you’ll weave into your images. When a couple tells you about camping under the stars on their second date, you know to look for moments where they gaze upward together, their connection mirrored in the vastness above them.
Pay attention to how they interact during this conversation. Do they finish each other’s sentences? Does one lean into the other when sharing vulnerable memories? These natural gestures become your blueprint for authentic posing later. You’re not inventing their dynamic; you’re learning to recognize and document it.
- What activities do you enjoy together in nature, and how do you typically move through outdoor spaces?
- Are there specific elements at your chosen location that hold personal meaning?
- How comfortable are you with being photographed, do you prefer gentle guidance or more direction?
- Will you be wearing an adventure elopement dress or attire that requires movement considerations?
- What emotions do you want to remember when you look back at these images in ten years?
This groundwork transforms your shoot from a posed session into a genuine documentation of their story within the landscape. You’ll arrive on location knowing not just where to stand, but why these two people belong in this particular slice of the Canadian wilderness together.
Researching and Selecting the Perfect Canadian Locations
Evaluating a Location’s Narrative Potential
When you arrive at a potential location, your first job isn’t composing a shot, it’s reading the environment for storytelling power. Ask yourself: does this setting reveal something about the couple’s relationship, their values, or this moment in their lives? A windswept Pacific coastline speaks to adventure and raw emotion; a quiet forest clearing surrounded by old-growth cedar suggests intimacy and rootedness. The location should feel like a natural extension of their story, not just a pretty backdrop.
Examine your backgrounds critically. Look for clean, uncluttered horizons that won’t compete with your subjects, distant mountain ranges, open sky, or soft wildflower backgrounds that add color without visual noise. Avoid busy elements like parking lots, power lines, or crowds of tourists that pull focus from the couple. Your background should provide context without distraction.
Next, scout for natural framing elements in the foreground and middle ground. Overhanging tree branches, rock formations, or tall grasses can create depth and draw the eye toward your subjects. These elements work best when they’re slightly out of focus, adding dimension without demanding attention. Walk the space from multiple angles, a location that looks chaotic from one vantage point might reveal elegant natural framing from fifteen feet to the left, where a gap in the foliage perfectly isolates your couple against the landscape beyond.
Scouting Visits and Backup Plans
Visit your chosen location at least once before the shoot day, ideally during the same time of day you’ll be photographing. Notice how light moves across the landscape, where shadows fall, and which angles showcase both the environment and your subjects most effectively. Walk the terrain your couple will navigate, those rocky shorelines and forest trails that look magical in photos can be treacherous in wedding attire.
Document everything with reference shots: wide angles showing the full scene, close-ups of potential hazards, parking access, and alternative spots if your primary location becomes compromised. Note cell service availability, distance to restrooms, and how far couples need to walk in formal wear. Time the journey from their getting-ready location to avoid schedule surprises.
Weather in Canadian landscapes shifts fast. Always develop a Plan B location that offers similar visual storytelling but with better shelter or lighting conditions. For coastal shoots, scout inland alternatives with protected coves. For mountain elopements, identify lower elevation backups that still capture alpine character. Keep your couples informed about both options during planning, so last-minute location switches feel like thoughtful adaptation rather than crisis management. The best environmental portraits happen when you’ve anticipated challenges before they arrive.
Planning Your Shoot Day Timeline and Shot List
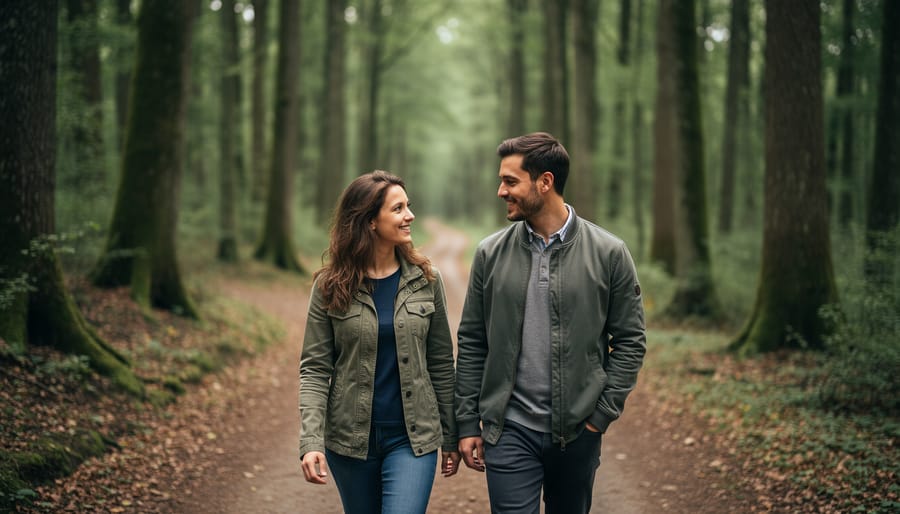
Your timeline becomes the invisible framework that lets magic happen, strict enough to capture that golden hour near sunrise over the Rockies, loose enough to pause when your couple shares an unscripted moment that defines their entire story. Start by anchoring around light. Identify when golden hour peaks at your location (it shifts dramatically between Vancouver Island’s coast and Alberta’s prairies), then work backward and forward from there, building in buffer time that most photographers dangerously skip.
A flexible structure for a typical three-hour environmental portrait session might look like this:
- Arrival and reconnection (20 minutes): Meet your couple at the primary location, review the plan, let them settle into the environment and each other.
- Wide environmental establishing shots (30 minutes): Capture the couple within the full landscape while light is still even, establishing the setting as a character in their story.
- Intimate environmental portraits (40 minutes): Move closer, use natural framing elements, focus on connection while maintaining environmental context.
- Travel to secondary location if planned (15-20 minutes): Build this transit time into your schedule, not as an afterthought.
- Golden hour magic (45 minutes): Your priority window, work efficiently but don’t rush, this light defines environmental portrait work.
- Spontaneous moments and wrap (15 minutes): Follow the couple’s energy, capture authentic interactions as the session winds down naturally.
Create a shot list that serves as a safety net, not a script. Note must-have compositions, the couple silhouetted against that mountain vista, framed by the forest cathedral, walking the shoreline, but leave gaps for discovery. Apply the same elopement planning tips you’d give couples: build in margin for weather shifts, difficult terrain, or those unplanned detours that become the session’s most treasured images. Your timeline should feel like a river with banks, not a train on tracks.
Working on Location: Directing Couples Within Their Environment
Composition Techniques for Environmental Balance
The difference between a portrait that happens to include scenery and a true environmental portrait lives in your composition choices. Your frame needs to honor both the couple’s connection and the Canadian landscape’s character without letting either overwhelm the other.
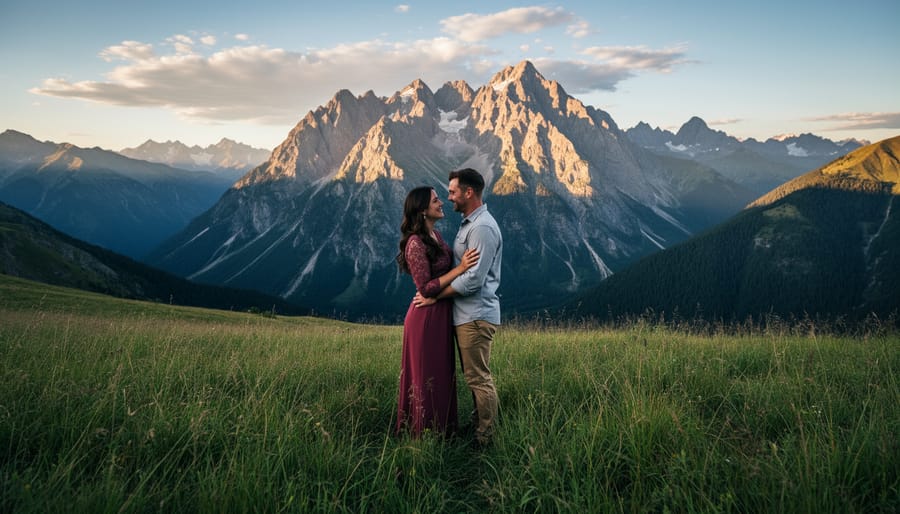
Start with the rule of thirds, but apply it with intention. Position your couple at an intersection point rather than dead center, then fill the remaining two-thirds with meaningful environmental context, a mountain range behind them, forest depth stretching into the background, or the curve of a shoreline. This creates visual tension that keeps viewers moving through the entire frame rather than settling only on faces.
Leading lines naturally guide attention. A weathered dock pointing toward your couple, fence rails converging behind them, or the treeline of a valley all create pathways that draw the eye to your subjects while simultaneously showcasing where they stand. In Canadian landscapes, rivers, mountain ridges, and forest paths offer ready-made compositional tools.
Natural framing adds intimacy within vast spaces. Position couples beneath an overhanging cedar branch, within the arch of two leaning trees, or framed by the opening of a rocky outcrop. This technique contains the emotional intimacy of your subjects while the background establishes scale and place. The frame-within-frame approach tells viewers exactly where to look first while the surrounding environment explains why this location matters.
Balance means neither element disappears, both couple and landscape share the story equally.
Capturing Authentic Emotion in Natural Settings
The difference between stiff, self-conscious portraits and images that radiate genuine connection often comes down to how quickly you help couples forget the camera exists. Start by acknowledging the awkwardness most people feel when asked to “be romantic” on command. A simple “This always feels weird at first, and that’s completely normal” gives couples permission to laugh through the initial discomfort rather than fight it.
Movement breaks the tension faster than static posing. Ask them to walk toward you holding hands, then stop and whisper something that made them laugh during the proposal. Have them explore a trail together while you follow at a distance, capturing their natural gait and the way they lean into each other. The Canadian landscape becomes your ally here, direct their attention to a view, a rushing creek, or autumn leaves underfoot, shifting focus away from performing for you.
Specific prompts work better than vague directions like “look in love.” Try “Tell her the moment you knew you wanted to marry her” or “Show me how you greet each other after a long day apart.” These concrete actions trigger real emotion and natural body language. When couples start responding to each other instead of the camera, step back and let the moment breathe. Your job becomes documenting rather than directing.
Watch for micro-expressions between prompts, the hand squeeze, the forehead touch, the shared glance when they think you’re adjusting settings. Those unguarded seconds often yield the most honest images.
Balancing Natural and Artificial Light in Mixed Conditions
Lighting the environmental portrait means juggling two competing goals: you want the Canadian landscape to shine in all its natural glory, and you need your couple properly exposed without that jarring “flash look” that screams intervention. The trick isn’t choosing between natural and artificial light, it’s blending them so seamlessly that viewers never notice you added anything at all.
Start by metering for your environment. In bright midday conditions along the Rockies or open prairie, expose for the sky first to preserve detail in clouds and mountain peaks, then bring your subjects up to match. A small off-camera flash or LED panel positioned just outside the frame can lift your couple’s faces without overpowering the scene. Keep your flash power low, often one-quarter to one-half power is plenty, and feather the light so it grazes rather than blasts your subjects.
In shadowed forest settings like those found in BC’s coastal rainforests, the challenge flips. The canopy creates beautiful filtered light but often leaves couples’ faces too dark while the background glows. Here, a reflector bouncing existing light back onto your subjects often works better than flash, maintaining that soft, natural feel. When you do add flash in these dim conditions, warm it up with a quarter or half CTO gel to match the golden tones of sunlight filtering through trees.
Weather changes demand quick thinking. When clouds roll in during a mountain elopement, your ambient light drops fast. Switch to continuous LED panels that let you see exactly how the light blends in real-time, adjusting colour temperature on the fly as the sky shifts from blue to grey. The goal is always the same: your couple should feel like they belong in their landscape, lit by it rather than imposed upon it.
Reviewing and Selecting Your Best Environmental Portraits
Your initial cull begins the moment you return from the shoot, while the energy of the location still pulses in your memory. Start by sorting through your frames quickly, dismiss any technical failures, closed eyes, or distracting moments, then move into deeper selection where both story and setting earn their place in the final gallery.
The strongest environmental portraits reveal a conversation between couple and landscape. As you review, look for images where the subjects feel genuinely present in their surroundings, not dropped into them. Their body language should echo the environment’s character: relaxed in a mountain meadow, windswept on a coastal bluff, intimate beneath forest canopy. The setting shouldn’t compete for attention but amplify what’s already happening between them.
When evaluating your selects, check for these essential qualities:
- Sharp focus on the subjects with intentional background treatment
- Balanced exposure where both faces and landscape details remain readable
- Natural light quality that enhances mood without harsh shadows or blown highlights
- Authentic expressions and body language that show genuine connection
- Compositional balance that gives both subject and setting their due weight
- Clean backgrounds free of distracting elements, power lines, or accidental photobombers
- Emotional resonance that captures a specific moment in their story
Watch for moments where the couple forgot your presence entirely. Those unguarded seconds, a shared laugh, a quiet glance, fingers intertwined while gazing at the view, often produce the most powerful environmental work. The landscape becomes witness rather than backdrop.
Your final verification should ask: does this image tell their story? Can you feel both where they were and who they are together? If the portrait works equally well cropped tight or zoomed out, you’ve nailed the balance. Select the frames where removing either element, couple or Canadian wilderness, would diminish what the photograph says.
Common Mistakes and How to Avoid Them
Even experienced photographers stumble when shifting to environmental portrait work. The most frequent mistake? Letting the landscape swallow your subjects. I’ve seen stunning mountain vistas where the couple becomes ant-sized specks, technically impressive scenery that fails as a portrait. Your environment should complement and frame the love story, not compete with it. If viewers notice the backdrop before the connection between your couple, recompose.
Poor light timing cripples otherwise solid sessions. Showing up at noon beneath the harsh Rockies sun creates squinting subjects and unflattering shadows no amount of fill flash can rescue. Plan your shoot around golden hour, or embrace overcast conditions that provide natural diffusion. Don’t fight midday light, reschedule instead.
Over-editing destroys the authenticity that makes environmental portraits powerful. I’ve watched photographers crush the natural tones of British Columbia forests into teal-and-orange Instagram presets, stripping away the very atmosphere couples chose that location for. Your editing should enhance what was already present, not transform a coastal ceremony into something unrecognizable. Keep skin tones natural, preserve the genuine color palette of Canadian seasons, and resist the urge to add drama through artificial saturation.
Neglecting foreground elements creates flat, disconnected compositions. When you’re focused on positioning your couple against that perfect lake view, you might miss distracting branches jutting into the frame or awkward ground clutter. Take three seconds before each shot to scan your entire frame, edges included.
Finally, over-directing kills spontaneity. If you’re micromanaging hand placement while your couple stands stiffly in a beautiful setting, you’ve missed the point. Give prompts that encourage interaction, then step back and document what unfolds.
Frequently Asked Questions About Environmental Portrait Photography
What Lens Should I Use for Environmental Portraits at Weddings?
A 35mm or 50mm prime lens works beautifully for most environmental portrait situations, giving you enough width to capture meaningful surroundings while keeping your couple prominent in the frame. For tighter spaces like forest clearings or when you want more environmental drama, a 24mm can open up the scene without distorting your subjects if you keep them centered. Save your 85mm or longer lenses for detail shots, they compress the background too much for true environmental storytelling. Many photographers carry two bodies during elopements: one with a 35mm for environmental work and another with an 85mm for intimate close-ups.
How Far Should I Position Myself from the Couple?
Your distance depends entirely on the story you’re telling and the landscape’s scale. For intimate environmental portraits in smaller settings, a forest path, a rocky outcrop, you might be only 10-15 feet away with a 35mm lens. When you’re working with expansive Canadian vistas like mountain ranges or coastal cliffs, stepping back 30-50 feet with a wider lens lets the landscape breathe while keeping your couple visible and emotionally connected to the viewer. Walk the distance: if you can’t see your subjects’ expressions clearly through your viewfinder, you’ve gone too far and the environmental context will overpower their story.
What camera settings work best for balancing subject and background sharpness?
Shoot at f/4 to f/8 for environmental portraits, this aperture range keeps both your couple and their surroundings recognizable while maintaining separation through composition rather than shallow depth of field. At f/2.8 or wider, you’ll blur the environment too much and lose the context that defines this style.
How do I handle unpredictable Canadian weather during outdoor portrait sessions?
Build flexibility into your timeline by scheduling portrait time across two windows, one before the ceremony, one after, so you have options if weather shifts. Embrace dramatic conditions like fog, light rain, or brooding skies rather than waiting for perfect sunshine; these atmospheric moments often create the most memorable environmental portraits.
Do environmental portrait techniques change for different ceremony types?
Traditional weddings with larger groups require tighter framing and closer distances to keep everyone visible, while elopements let you step back and give the landscape equal weight. For intimate ceremonies of 2-10 guests, you have the freedom to experiment with scale and positioning that larger weddings don’t allow.
Should I shoot horizontal or vertical for environmental wedding portraits?
Horizontal orientation naturally suits landscape-heavy compositions and gives you room to show context on both sides of your couple. Shoot both orientations when time allows, horizontal for album spreads and wall art, vertical for social media and magazine-style layouts.
Can I Create Environmental Portraits in Poor Light Conditions?
Absolutely, though your approach shifts with the available light. Overcast days are actually ideal for environmental portrait work, the even light lets you expose for both couple and landscape without fighting harsh shadows or blown highlights. During golden hour in forested locations, you might be working with dappled light that’s tricky to meter; expose for your couple’s faces and let the surrounding trees fall slightly darker to maintain depth. If you’re shooting in flat midday light, position your couple where natural elements like cliff faces or tree canopies create interesting shadow patterns, then use a subtle fill light to lift their faces without overpowering the scene’s natural feel.
Environmental portrait photography transforms wedding storytelling from simple documentation into something far more powerful. By weaving together the raw emotion of a couple’s commitment and the breathtaking character of Canadian landscapes, you create images that honor both their love and the places they chose to celebrate it. These aren’t just pretty pictures against scenic backdrops. They’re layered narratives where towering pines witness whispered vows, where mountain ridges frame the start of shared adventures, where ocean tides mirror the rhythm of two lives becoming one.
Mastering this technique takes practice, but every shoot sharpens your eye for balance, light, and authentic moment. Start small: revisit familiar locations with fresh intention, experiment with positioning couples at varying distances within the frame, and trust your ability to read both landscape and emotion simultaneously. Build your portfolio deliberately, choosing work that showcases diversity in setting, weather, and couple dynamics.
The couples who seek out environmental portraits aren’t just hiring a photographer. They’re inviting you to understand their connection to a place and preserve that relationship forever. When you get it right, you deliver more than wedding photos. You deliver their love story written across the landscapes they’ll always remember.