
Machine polishing your wedding car one week before your ceremony delivers the deep, glass-smooth shine cameras love while leaving enough time to cure the finish and perform a final gentle wash. This timing protects your work from unexpected weather or road grime in the final countdown while ensuring every reflection in your photos, whether against the Rockies or beside Lake Ontario, looks flawless.
The process takes three to four hours and requires moderate physical effort, but the transformation is dramatic. You’ll remove fine scratches, swirl marks, and oxidation that dull paint under bright sunlight, replacing them with mirror-like clarity that elevates every detail in your wedding album. The one-week buffer matters because fresh polish needs 12 to 24 hours to fully bond, and you want that protection locked in before your rehearsal dinner or any last-minute errands that could introduce new contaminants.
Couples often underestimate how much their vehicle appears in wedding photography. Your car frames your arrival, anchors candid moments as you pause for a kiss against the hood, and becomes a nostalgic backdrop for portraits you’ll treasure decades from now. A properly polished finish doesn’t just look clean. It amplifies color depth, enhances metallic flake, and catches golden-hour light in ways that turn a functional detail into an heirloom-quality image.
This guide walks you through selecting the right dual action polisher, preparing the surface, executing each polishing stage safely, and verifying photo-ready results. You’ll also learn how to maintain that finish through your wedding day so your vehicle looks as breathtaking in person as it does in every frame.
Why the Week Before Is the Perfect Time to Polish
Timing your machine polish for exactly one week before your wedding isn’t arbitrary, it’s strategic planning that sets you up for flawless results. When you finish polishing seven days out, the protective layers have adequate time to cure and bond fully with your car’s paint. This curing process typically takes 12 to 24 hours, but allowing a full week ensures the finish reaches maximum hardness and develops that deep, liquid shine that photographs so beautifully.
The buffer period proves invaluable if you spot any areas that need attention after your initial inspection. Maybe you notice a section that dried with streaks, or morning light reveals swirl marks you missed during evening work. With seven days in hand, you can address these concerns calmly rather than scrambling the night before your ceremony. This breathing room transforms what could be stressful into a satisfying part of your wedding preparation.
Weather patterns across Canada make timing especially crucial. Summer heat in the Prairies can cause polishing compounds to dry too quickly if you wait until the last minute, while coastal moisture in BC might introduce water spots on freshly polished surfaces. Prairie dust storms or sudden rain in Ontario can undo rushed polishing work. A week-before schedule accounts for these variables, if weather turns challenging mid-week, you still have days to work with rather than hours. Even winter wedding conditions benefit from this timeline, as cold temperatures slow product curing and demand extra planning.
By wedding morning, your car’s finish has stabilized completely, requiring only a light dust removal rather than intensive work when you should be focused on getting ready.
What You’ll Need: Tools and Materials for Machine Polishing
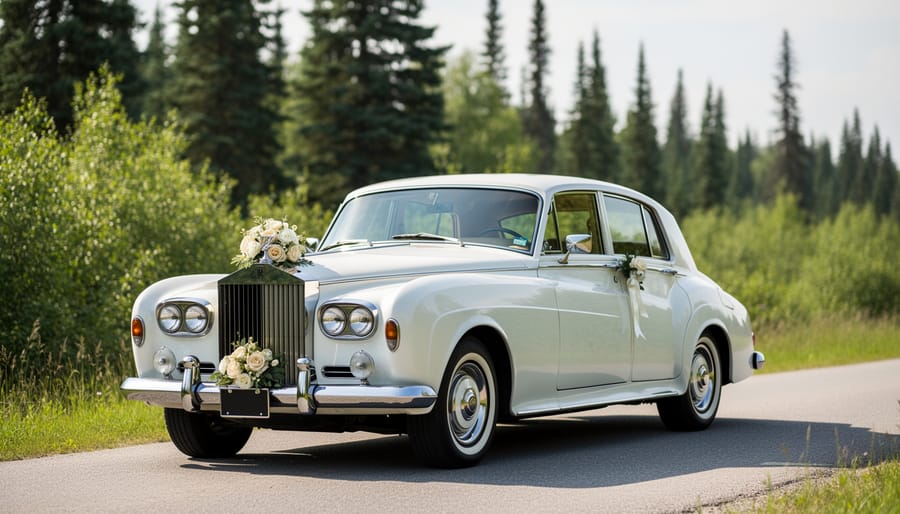
Gathering the right tools before you begin ensures a smooth polishing process and professional results that will shine beautifully in your wedding photos. You don’t need a professional detailer’s full arsenal, but investing in quality equipment makes the difference between a good finish and a truly photo-ready gleam.
Here’s everything you’ll need for machine polishing your wedding car:
- Dual-action polisher: Choose a model with variable speed settings, typically 600-3000 OPM. Mint Protools machines cover the entry-level to enthusiast range and are forgiving enough that they won’t burn through paint.
- Polishing compounds: Both a cutting compound for correction and a finishing polish for final gloss. Matched cut-and-finish pairings are designed to be used in sequence, so the second stage clears the haze the first one leaves behind.
- Foam polishing pads: At minimum, one orange cutting pad and one black finishing pad in the size matching your polisher backing plate. Have backups, as pads need cleaning between sections.
- Microfiber towels: A dozen quality towels in different colors. Use separate sets for washing, polish removal, and final buffing to avoid cross-contamination.
- Wash supplies: Two buckets with grit guards, pH-neutral car shampoo, wash mitt, wheel brush, and hose with spray nozzle.
- Clay bar kit: Medium-grade clay with lubricant spray removes embedded contaminants that washing can’t touch.
- Masking tape: Blue painter’s tape protects trim, emblems, and rubber seals from polish buildup.
- Inspection light: A bright LED work light or headlamp reveals swirls and imperfections that natural light might hide.
A specialist detailing supplier is a better starting point than a general auto aisle for this job, because the machine, the pads and the compounds all have to match each other. Car Care Products carries the Mint Protools machines, the matched cutting and finishing compounds and the pads and microfibre that go with them, which keeps backing-plate sizes and the cut-to-finish sequence consistent rather than assembled from three places. Budget around $200-300 for a complete first-time setup, or less if you already own quality microfiber towels and wash supplies.
Quality matters most for the polisher itself and the compounds. Cheap pads can be replaced easily, but an underpowered or poorly balanced polisher makes the job exponentially harder and risks uneven results in your wedding photos.
Safety and Precautions Before You Begin
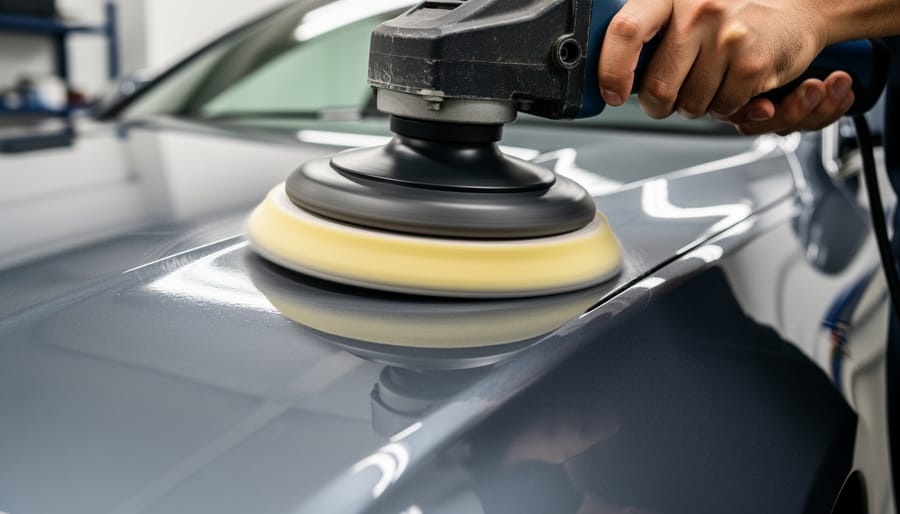
Machine polishing transforms paint, but it also generates friction and heat that can damage your wedding car if you’re not careful. Taking the right precautions protects both you and your vehicle, ensuring the process enhances rather than harms the finish you’ll see in your wedding photos.
Always work in a shaded area or garage, away from direct sunlight. Heat accelerates the polishing compound’s drying time, making it difficult to work with and increasing the risk of paint damage. In Canadian summer conditions, even morning sun can warm body panels enough to cause problems. Touch the surface before you begin, if it feels warm to your hand, wait until it cools or move to a shaded spot.
Before you start the polisher, protect vulnerable areas with masking tape. Cover rubber trim, plastic emblems, and weatherstripping around windows and doors. Polish compound can stain these materials and is difficult to remove once it dries in crevices. Pay special attention to areas near electrical components like sensors, cameras, and charging ports.
Wear safety glasses throughout the process. Polishing compound can splatter, especially when you first touch the pad to the paint or lift it away. If working indoors, ensure adequate ventilation, some compounds produce fumes that build up in enclosed spaces.
Learn to recognize when to stop. If you see the paint colour on your pad or towel, you’ve cut through the clear coat and must cease immediately. If a panel feels excessively hot under your hand, pause and let it cool. If you encounter deep scratches that don’t improve after one cutting pass, don’t keep trying, repeated aggressive polishing risks burning through. Some imperfections require professional wet sanding or touch-up paint, and recognizing these limits protects your investment and ensures your car looks beautiful standing beside you in the Canadian landscape on your wedding day.
The Complete Machine Polish Process: Step by Step
Step 1: Wash and Decontaminate the Surface
Start in a shaded spot or garage, never in direct sunlight. Heat accelerates drying and can bake soap into the paint, creating spots you’ll later try to polish away. Set up two buckets: one with car wash soap diluted per bottle instructions, the other with clean rinse water. The two-bucket method prevents dirt from being dragged back onto paint, which would create new scratches as you wash.
Begin with wheels and tires using a separate mitt or brush. These collect brake dust and road grime that you don’t want transferring to painted surfaces. Work from top to bottom on the body: roof, windows, upper panels, then lower sections where contamination concentrates. Dip your wash mitt in soapy water, clean a panel section, then rinse the mitt thoroughly in the clean water bucket before reloading with soap. This simple habit prevents swirl marks.
After the wash, while the car is still wet, use a clay bar kit. This step removes bonded contaminants that washing can’t touch: tree sap, industrial fallout, rail dust, overspray. Spray the clay lubricant on a small area, glide the clay back and forth with light pressure until it moves smoothly. You’ll feel when embedded particles are gone. Work panel by panel, kneading the clay to expose clean surface as it picks up debris.
Rinse the entire car with a final sheet of clean water, starting from the top. Dry immediately using clean microfiber towels, working in straight lines rather than circles. Any contaminants left at this stage will scratch the paint when you start polishing.
Step 2: Inspect and Mark Problem Areas
Move your car to a well-lit area or better yet, use a portable LED inspection light to reveal imperfections the naked eye misses. Work methodically around each panel, angling the light across the paint surface at 45 degrees. You’ll spot swirl marks that catch the light like tiny spider webs, deeper scratches that appear as distinct lines, cloudy oxidation where the clear coat has weathered, and mineral deposits from water spots.
Mark severe scratches or deep oxidation with small pieces of masking tape. These visual guides help you focus extra passes where they’re needed most and prevent you from over-polishing already good areas.
Set honest expectations now: machine polishing removes imperfections in the clear coat but won’t fix chips down to primer, deep gouges through multiple paint layers, or dents. If you discover damage beyond surface-level swirls, that’s okay. Your photos will still be beautiful, the overall shine matters far more than one tiny imperfection nobody will notice when you’re beaming beside your partner against a Rocky Mountain backdrop.
Step 3: Apply Cutting Polish (First Pass)
Start with a clean foam cutting pad attached to your polisher. Apply four pea-sized dots of cutting compound directly to the pad, not the car, to prevent splattering. Choose a two-by-two-foot section on a flat panel like the hood or door, avoiding edges and trim for now.
Place the pad flat against the surface before switching on. Turn the polisher to its lowest setting and spread the compound across your section with slow, overlapping passes. This prevents the product from flinging off and ensures even coverage. Once spread, increase to medium speed, typically setting 4 or 5 on most dual-action polishers.
Work the compound into the paint using steady, overlapping horizontal passes, then repeat with vertical passes to create a crosshatch pattern. Keep the pad flat against the surface and let the machine do the work. Excessive pressure accomplishes nothing except tire your arms and potentially create uneven spots. You should feel just enough contact to keep the pad engaged.
Stay clear of sharp body lines, plastic trim, rubber seals, and badges. The pad’s edge can catch these features and either damage them or leave compound residue that’s difficult to remove. Work right up to these areas but not over them.
After three to four passes in each direction, wipe away the residue with a clean microfiber towel. Inspect the section under good light. The paint should look clearer, with reduced swirls catching the light.
Step 4: Apply Finishing Polish (Second Pass)
With the cutting stage complete, you’re ready to transform that corrected surface into a brilliant, camera-ready shine. Switch to a softer foam pad, typically a black finishing pad, and apply a finer finishing polish designed to remove any micro-marring left from the cutting compound.
Work the same way you did before: section by section, 2×2 feet at a time. Apply a few pea-sized dabs of finishing polish to your fresh pad, spread it on low speed, then increase to medium speed and make overlapping passes. The difference? Your movements can be slightly quicker now since you’re refining rather than correcting. You’ll notice the polish works faster and leaves behind a wet-looking gloss instead of the chalky residue from cutting.
Pay special attention to panels that will feature prominently in your photos, the hood, doors, and trunk lid. These surfaces catch light beautifully in images, especially during golden hour shoots across Canadian prairies or beside mountain lakes. After each section, wipe clean with a fresh microfiber towel. The reveal is always rewarding: a deep, mirror-like finish that reflects clouds and trees with stunning clarity. This is the shine that makes your wedding photos timeless.
Step 5: Final Inspection and Touch-Ups
Once you’ve completed your finishing polish pass, step back and examine the entire vehicle under bright, natural light, ideally outdoors in diffused daylight rather than harsh midday sun. Walk slowly around the car, crouching to view panels from different angles. This reveals inconsistencies you’d miss from standing height: areas where the gloss drops off, faint hazing you didn’t fully remove, or sections you inadvertently skipped.
Pay special attention to complex curves, around door handles, fuel caps, and character lines, where your polisher might not have maintained consistent contact. If you spot dull patches, apply a small amount of finishing polish to your pad and rework just that area with light pressure.
Carefully remove all masking tape from trim, emblems, and rubber seals. Inspect these borders closely; polish residue loves to hide in crevices and panel gaps. Use a soft detailing brush or folded microfiber corner dampened slightly with water to lift away any white residue from black trim, window seals, and door jambs.
Run your hand gently across the paint, it should feel glassy smooth everywhere, with no variation in texture or sheen as you move from panel to panel.
Step 6: Seal and Protect the Finish
After all your hard work machine polishing, you need to lock in that brilliant shine with a protective layer. Think of it as sealing your love story into every gleaming surface, ready to reflect Canada’s breathtaking landscapes in your wedding photos.
Choose a quality carnauba wax for warmth and depth, or a synthetic sealant for longer-lasting protection through the week. Working in the shade on cool panels, apply a thin, even layer using a foam applicator in straight, overlapping lines. Don’t circle, as this can create subtle patterns that show up in close-up photography.
Let the product haze according to package directions, usually three to five minutes. Buff gently with a clean microfiber towel using light pressure, turning the cloth frequently to avoid reapplying residue. The goal is crystal-clear protection, not thick buildup.
This protective barrier shields against morning dew, light dust, and pollen during the week ahead. It also enhances water beading, so if unexpected rain arrives, droplets will simply roll off rather than spotting your freshly polished finish. When your wedding day dawns, your car will still gleam like you just finished polishing it moments before.
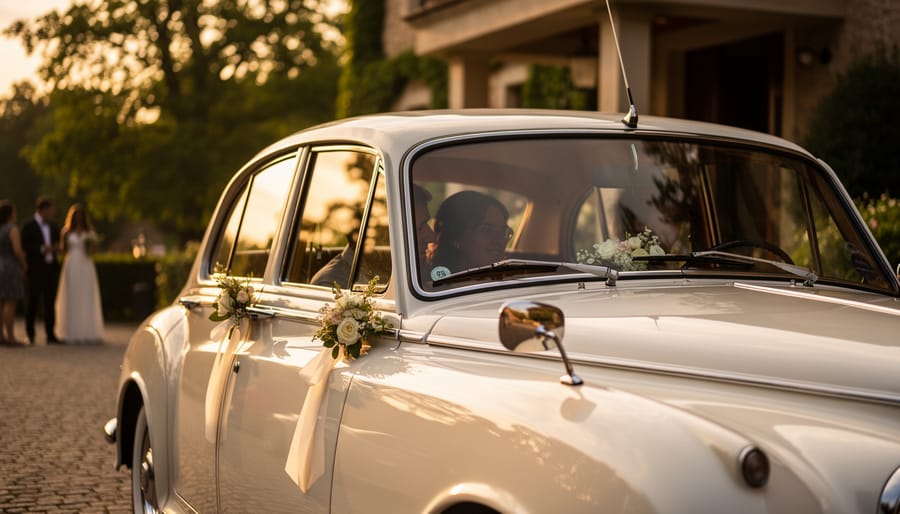
Verifying Your Results: How to Know It’s Photo-Ready
Stand in front of your polished car and look for your reflection in the paint. If you can see crisp details of your face, clothing, and surroundings mirrored back with clarity, you’ve achieved photo-ready shine. Distorted or hazy reflections mean you need another finishing pass on those panels.
Next, spritz water on a small section of the hood. Perfect polish creates tight, uniform beads that roll off cleanly rather than spreading into flat sheets. This water-bead test confirms your sealant bonded properly and the surface is smooth enough to photograph beautifully.
Move the car between different lighting conditions throughout the day. Check it in direct sunlight, open shade, and during golden hour when wedding photos typically happen. Photo-ready finish looks flawless in all three, with no sudden appearance of swirls or dull patches that only show up in certain light. Pay special attention to how the paint responds to side-lighting, which reveals imperfections your eye might miss straight-on.
Run through this quick verification checklist:
- Reflection test: sharp, undistorted mirror image in the paint
- Water-bead test: tight, uniform beads that roll off cleanly
- Swirl check: no circular scratches visible under bright light
- Gloss consistency: even shine across all panels and angles
- Edge inspection: trim lines and body gaps free of polish residue
The ultimate test is taking practice photos. Shoot your car from multiple angles at your actual Canadian photo locations if possible. Against mountain backdrops, the paint should mirror peaks and sky without muddiness. Near forest settings, deep greens should reflect cleanly. At lakeside ceremonies, water and horizon lines should appear crisp in the car’s surface. Review these images on a large screen, applying environmental portrait tips to see how the car integrates with its surroundings. If the finish disappears into the landscape with jewel-like clarity, you’re ready for wedding day.
Maintaining the Shine Until Wedding Day
Your freshly polished car is ready to star in your wedding photos, but the work doesn’t end when you set down the polisher. The next seven days require mindful protection to preserve that flawless finish until you say “I do.”
Park strategically throughout the week. Choose covered parking whenever possible, or find consistent shade under a carport or mature tree. If neither option exists, invest in a quality breathable car cover that won’t trap moisture against your pristine paint. Avoid parking near construction sites, gravel lots, or anywhere dust and debris might settle on the surface.
When light dust inevitably appears, resist the urge to wipe it with your hand or a random cloth. Keep a premium plush microfiber towel in your car and use gentle, sweeping motions to lift particles away rather than dragging them across the paint. Never circle or scrub, even lightly.
If rain arrives during the week, don’t panic. Your sealant provides protection, but afterward, use filtered or distilled water in a spray bottle to rinse away any water spots before they dry, then pat dry with a clean microfiber towel. Skip the automatic car wash entirely, those spinning brushes can introduce new swirls in minutes.
On wedding morning, give your car a final once-over. A quick pass with a detailing spray and microfiber cloth removes any overnight dew or fingerprints. This careful tending mirrors the anticipation building toward your ceremony, each small act of care reflecting the love you’ll celebrate. When your photographer captures your gleaming car against Canada’s breathtaking scenery, you’ll see that dedication reflected in every frame. And if you want those images truly perfect, consider professional car photo editing to enhance the shine even further.
Common Questions About Wedding Car Machine Polishing
Couples preparing their wedding car often have similar concerns about the machine polishing process. These questions come up frequently in our conversations with engaged pairs planning their perfect photo day across Canada.
Can I polish the day before my wedding instead of a week ahead?
While you can polish the day before, the week-ahead timeline allows the protective sealant to fully cure and bond to the paint, creating a more durable finish. It also gives you time to address any issues without last-minute stress, and the polish will actually photograph better after several days of curing.
What if my car has never been professionally polished before?
First-time polishing often produces the most dramatic results, as you’re removing years of accumulated oxidation and swirl marks. Just plan for extra time during the cutting polish stage, and be patient with heavily neglected paint that may require multiple passes to restore clarity.
Can I safely do this in my driveway?
Absolutely, as long as you have access to shade or choose an overcast day. Avoid direct sunlight, which causes compounds to dry too quickly and creates uneven results. A carport, garage with open door for ventilation, or tree-shaded driveway all work perfectly well.
What should I do if I notice new swirls after polishing?
New swirls typically appear from improper drying or contaminated towels during the final wipe-down. Use only clean, dedicated microfiber towels and the proper technique. If swirls appear, you can address small areas with a quick finishing polish pass without redoing the entire car.
Should I hire a professional detailer instead of doing this myself?
Professional detailing guarantees results and saves time, which matters when balancing wedding budget planning with other preparations. However, many couples find personal satisfaction in preparing their own car, and machine polishing is learnable with patience. Consider your comfort level, time availability, and how important this task is to your overall experience.
Will the polish finish look different in outdoor versus indoor wedding photos?
A properly polished car photographs beautifully in both settings, though the visual effect differs. Outdoor photos capture stunning reflections of landscapes, skies, and natural light, while indoor or shaded shots emphasize depth and clarity of the paint itself. Both showcase the quality of your work, just in different ways that your photographer will use to creative advantage.
The beauty of addressing these questions before you begin is that you’ll approach the polishing process with realistic expectations and confidence. Most concerns resolve themselves when you understand the why behind each step and give yourself permission to work methodically rather than rushing. Your wedding car will shine brilliantly in your photos, whether you’re parked beside a mountain lake or framed against prairie sunset skies, because you took the time to prepare it properly and address potential issues before they became problems.
When you see your wedding car gleaming in those first photos, you’ll understand why every careful pass with the polisher mattered. That mirror-like finish won’t just reflect the Rocky Mountains behind you or the golden light of a prairie sunset, it’ll reflect the dedication you brought to every detail of your celebration.
Machine polishing the week before gives you something rare in wedding planning: complete control over one beautiful element. As you worked section by section, you weren’t just removing swirls and scratches. You were creating a canvas worthy of the love story unfolding around it.
Take your time with this process. Let it be one of those quiet moments in the whirlwind of wedding preparation where you can see tangible results from your effort. Picture how that shine will look as you arrive at your ceremony site, how it’ll frame you and your partner in photos taken across Canada’s stunning landscapes.
These images will hang in your home for decades. Your grandchildren will point to that gleaming car and hear the story of your day. The care you invest this week becomes part of your legacy, captured forever in photographs that celebrate not just where you went, but how beautifully you arrived.